Tuesday, November 29, 2011

Home Is Where The Heart Is

At the beginning of the month I signed up for the Winter Handmade Gift Exchange that Linda at Craftaholics Anonymous hosts twice a year. I'd participated in June, and it was so much fun! 

My partner this time is Lauren from Warm & Fuzzy! Lauren is happily married and has two little guys. One of the first things that stood out to me from her e-mail was that Lauren is not only proud of her home and loves to decorate it, but she's extremely proud of her home state! She is a huge LSU fan, which I tried to not count that against her, since her Tigers beat my beloved Ducks so bad at the first game of the season that it still smarts. So I tried to incorporate all of these things into my gift for her.


I made her a Louisiana state shaped pillow!


I made a stencil of the shape of Louisiana and traced it onto my fabric. I painted a purple heart over the area where Lauren and her family live (at least according to the maps I found.)  


Than I painted in the rest of the state. 


I sewed around the shape, turned it right side out, stuffed it and sewed it closed. When I was done I had a cute little pillow the shape of Louisiana.


I hope that Lauren likes my gift. I'm so happy that it turned out how I had hoped. Amazing Boyfriend thought it turned out pretty cool and has now requested an Oregon shaped one, so I'll probably be making another state shaped pillow in the future. 

I'm sharing this project at the following link parties: 



Saturday, November 26, 2011

A House Divided

Warning: If you're not a college football fan, you probably won't be all that interested in the post, although you can scroll through the pretty pictures. 

Amazing Boyfriend and I are like peas in a pod most of the time. We like a lot of the same movies, music, have a lot of similar ideas in politics and religion. But there are some things that we just don't see eye to eye on. He hates most holidays, especially Christmas, while I love them. He is just not that into sports, while I'm an avid college football and basketball fan. 
 
He is an Oregon State Beaver fan and I'm a University of Oregon Duck fan. 

Somehow, I love him anyway. 
 
So awhile back I was discussing with him my ideas for the gift I'm making for my partner for Craftaholics Anonymous' Winter Handmade Gift exchange and he randomly gave me a crafty idea. (I LOVE when he gives me crafty ideas!) 


Civil War pillows!!!


Seriously, this is upcycling at it's finest. I already had the I Love My Ducks t-shirt, although it had mainly become a night shirt that had definitely seen better days. The Beaver shirt I reluctantly bought at Goodwill because I didn't know any Beaver fans that would actually give me a t-shirt. 


ABF's original idea was for me to make a pillow with the Beavers on one side and the Ducks on the other, but why do that when I can upcycle some old T-shirts into pillow covers that I can put on pillows I already have? 


Besides, I really must love him to actually sew him a Beaver pillow. Maybe he should just be happy with that, since it might be all he has to console himself after the Ducks beat the Beavers in this year's Civil War game. 


But there's always next year!

Friday, November 25, 2011

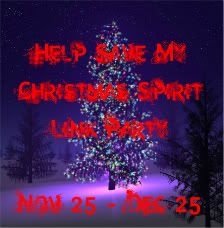
Help Save My Christmas Spirit!!!

The rest of the world seems to think that Christmas is the most wonderful time of the year. And there are plenty of wonderful things about it. I love spending time with my family, making things for family and friends, being generous and spreading cheer. 

However...
 
Since I work retail, my holiday spirit seems to get sucked right out of me as soon as I step through the door at work. Most of the time I don't even have a chance to clock in before I have someone demanding something from me or of me. 

So to unwind after a long day at work, I love to come home, curl up with a blanket and a cup of hot chocolate and look at all the amazing holiday creations and ideas that everyone has. Which means...

I'm having a Christmas/Holiday link party!!!


Help Save My Christmas Spirit


From midnight November 25th to midnight December 25th, this link party will be open!


I want to see how everyone else is celebrating the holidays. Holiday decorations, beautifully decorated trees, Christmas gift ideas, yummy holiday candy or recipes, any fun or silly traditions, anything holiday related that you can share to spread some holiday cheer! 

I do have a few guidelines - 


Holiday related posts only please - I will delete non-holiday related posts
Please add the button to your post, so that everyone can join in the fun. 
Please do not link Etsy shops or giveaways. 
Please visit other posts and leave comments for others - we all deserve a little holiday cheer!


Wednesday, November 23, 2011

A Little Glitter With Your Thanksgiving Dinner!

It's not enough that I made a pretty Thanksgiving table cloth, I wanted to make a pretty centerpiece too!


I got the idea from this picture that Jen from Tatertots & Jello used to display her Halloween ribbon table runner. As pretty as her table runner was, I have to admit that I was much more interested in the glitter pumpkins she was using as decoration. 

Wanna see how I did it? 


Supplies: 
3 foam pumpkins
glitter
mod podge
ribbon
glue gun
paper plate 
foam sponges, brush or paint brush


First I got my supplies all ready. I got my paper plates out to catch the glitter I was going to pour over the pumpkin. I got my mod podge and foam sponges ready. I decided to start by glittering the bottom of the pumpkin. I applied the mod podge in sections, than sprinkled the mod podge with the glitter, until the entire bottom of the pumpkin was covered.


Once the bottom of the pumpkins were dry, I began to repeat the process by glittering the top of the pumpkin. 


Now, here's where this almost turned into a craft fail...


craft FAIL!!!


I sprayed these pumpkins with a clear coat. Now, I'm not sure if I sprayed too close or what exactly went wrong, but I wasn't going to give up, so I just started over. I'm getting pretty good at starting over, these days. 

When I was finished re-glittering, I coated with a layer of mod podge to seal the glitter and keep it from flaking off. (Sorry, I didn't get a picture of that. Oops!) 


(Just pretend there is a picture here of a pumpkin coated in mod podge. And remember, that mod podge does go on white, but it dries CLEAR.) 


When the final coat of mod podge dried, it's time to apply the ribbon detail. I heated up my glue gun, Debra and got to work. I took my ribbon and wrapped it around the pumpkin, than made sure I had enough length to make a bow, and cut it. Than I found the half length of the ribbon. 


Than put a bit of glue on the middle of the pumpkin and stick the middle of the ribbon to it. 


Now, the pumpkins that I used had seams around the middle, so I just followed the seams and glued and covered them with ribbon, but not all foam pumpkins have that, so just make sure that you're ribbon is going around your pumpkin in a straight path. I also made sure that each side of my ribbon was glued on in equal parts so that my left over ribbon wasn't lopsided. 


Than you just have to make a bow. I did add a little hot glue to the back of the loops near the knot to make sure that my bow didn't end up really crooked. Finally I snipped off the tails of my bow at an angle and used a lighter to singe the ends just a little do they don't fray. 


I found some similar candlesticks at Goodwill and placed my glittered pumpkins on them. Than I arranged them, and wrapped a leaf garland I picked up on clearance at Michael's around the bottom.


You could do other things with your glitter pumpkins than put them on candlesticks, like put them on a large serving platter and wrap leaf garland around them or maybe find tiered candlesticks instead of all the same height. 

Just get creative! 


Now we have a beautiful centerpiece to put on the Thanksgiving table! Which, as my 2 year old niece exclaimed as I was putting it on the table, "Pretty!" I'm glad she approves. 


Monday, November 21, 2011

I Made Something Pretty & There Are Already Bets On Who's Gonna Ruin It...

Doilies seem to be a popular crafting trend this year. 


I found these fall themed doilies at the dollar store and knew they would be perfect to create a beautiful Thanksgiving tablecloth. 


 I think it turned out better than I pictured it in my head! 


I just took a natural toned tablecloth that I bought at Target, dazzling metallic paint from DecoArt and fabric paint medium, and used the doilies as a stencil. It took me about 4 and a half hours to complete with a short lunch break with Amazing Boyfriend somewhere near the end. 


And before any of you ask, yes, those are make up sponges that I used, because I realized that I didn't have any sponge brushes just before I laid all my supplies out. 


Hey, sometimes you have to rock what ya got! 


I also covered the table I was working on with plastic before I started, because even though I didn't use a lot of paint, it bled through a little bit.


I'm so pleased with how everything turned out, and my Mom is really happy with the end result. And I'm so happy that I got some good pictures of my pretty table cloth before one of my nieces and/or brothers spill something on it. 

Because in my family that's bound to happen.


Did you notice my pretty centerpiece? 


I'll show you guys how to make it on Wednesday. Super easy, I promise! 


I'm sharing this project at the following link parties: 


Related Posts Plugin for WordPress, Blogger...