
Either way, this post is all about the gift that I made for my Dad.
My Dad's birthday is actually the beginning of January. (Yup, I did say January.) I'm not gonna tell you how old he is, especially since my Dad really doesn't act his age (or anywhere close to it.) Unfortunately, in January is when Amazing Boyfriend started having health problems and life got in the way so I never got around to making this project for my Dad until now.
I made Dad his very own...
Etched Beer Mugs!!!

Wanna see how I did it?

Supplies
glass pieces to etch
etching cream
contact paper or vinyl
paint brush
craft cutting machine
This isn't my first project that I've made using etching cream. I used etching cream quite a bit around the holidays on different items for a few birthdays and Christmas gifts. I got pretty good at using it. But I've had several of my friends ask me if using etching cream is difficult. So I figured with this project that I'd show all my steps. Because honestly, the truth is that if I can do it, it really can't be that hard.
To get started, you need to decide what you're design is going to be. I'm one of those lucky people that own a silhouette machine (please don't hate me), but you can still do this project if you don't have a craft cutting machine. You just have to cut out your design on contact paper with a craft knife .

After you have the design cut out onto your contract paper or vinyl, you need to apply your stencil to your glass piece. Make sure that your piece is really clean, but don't use an ammonia based glass cleaner because it reacts with the etching cream. I used vinegar and it worked perfectly.


Once you have your stencil in place, it's time to apply your etching cream. I always wear gloves when I'm working with etching cream, although sometimes I think I'm just being overly cautious. I just use a soft bristle brush to apply a good layer of the cream to the stencil. I learned the hard way that if you use a brush that's too firm it can leave streaks with the etching cream.
 | ||
| Safety First!!! |

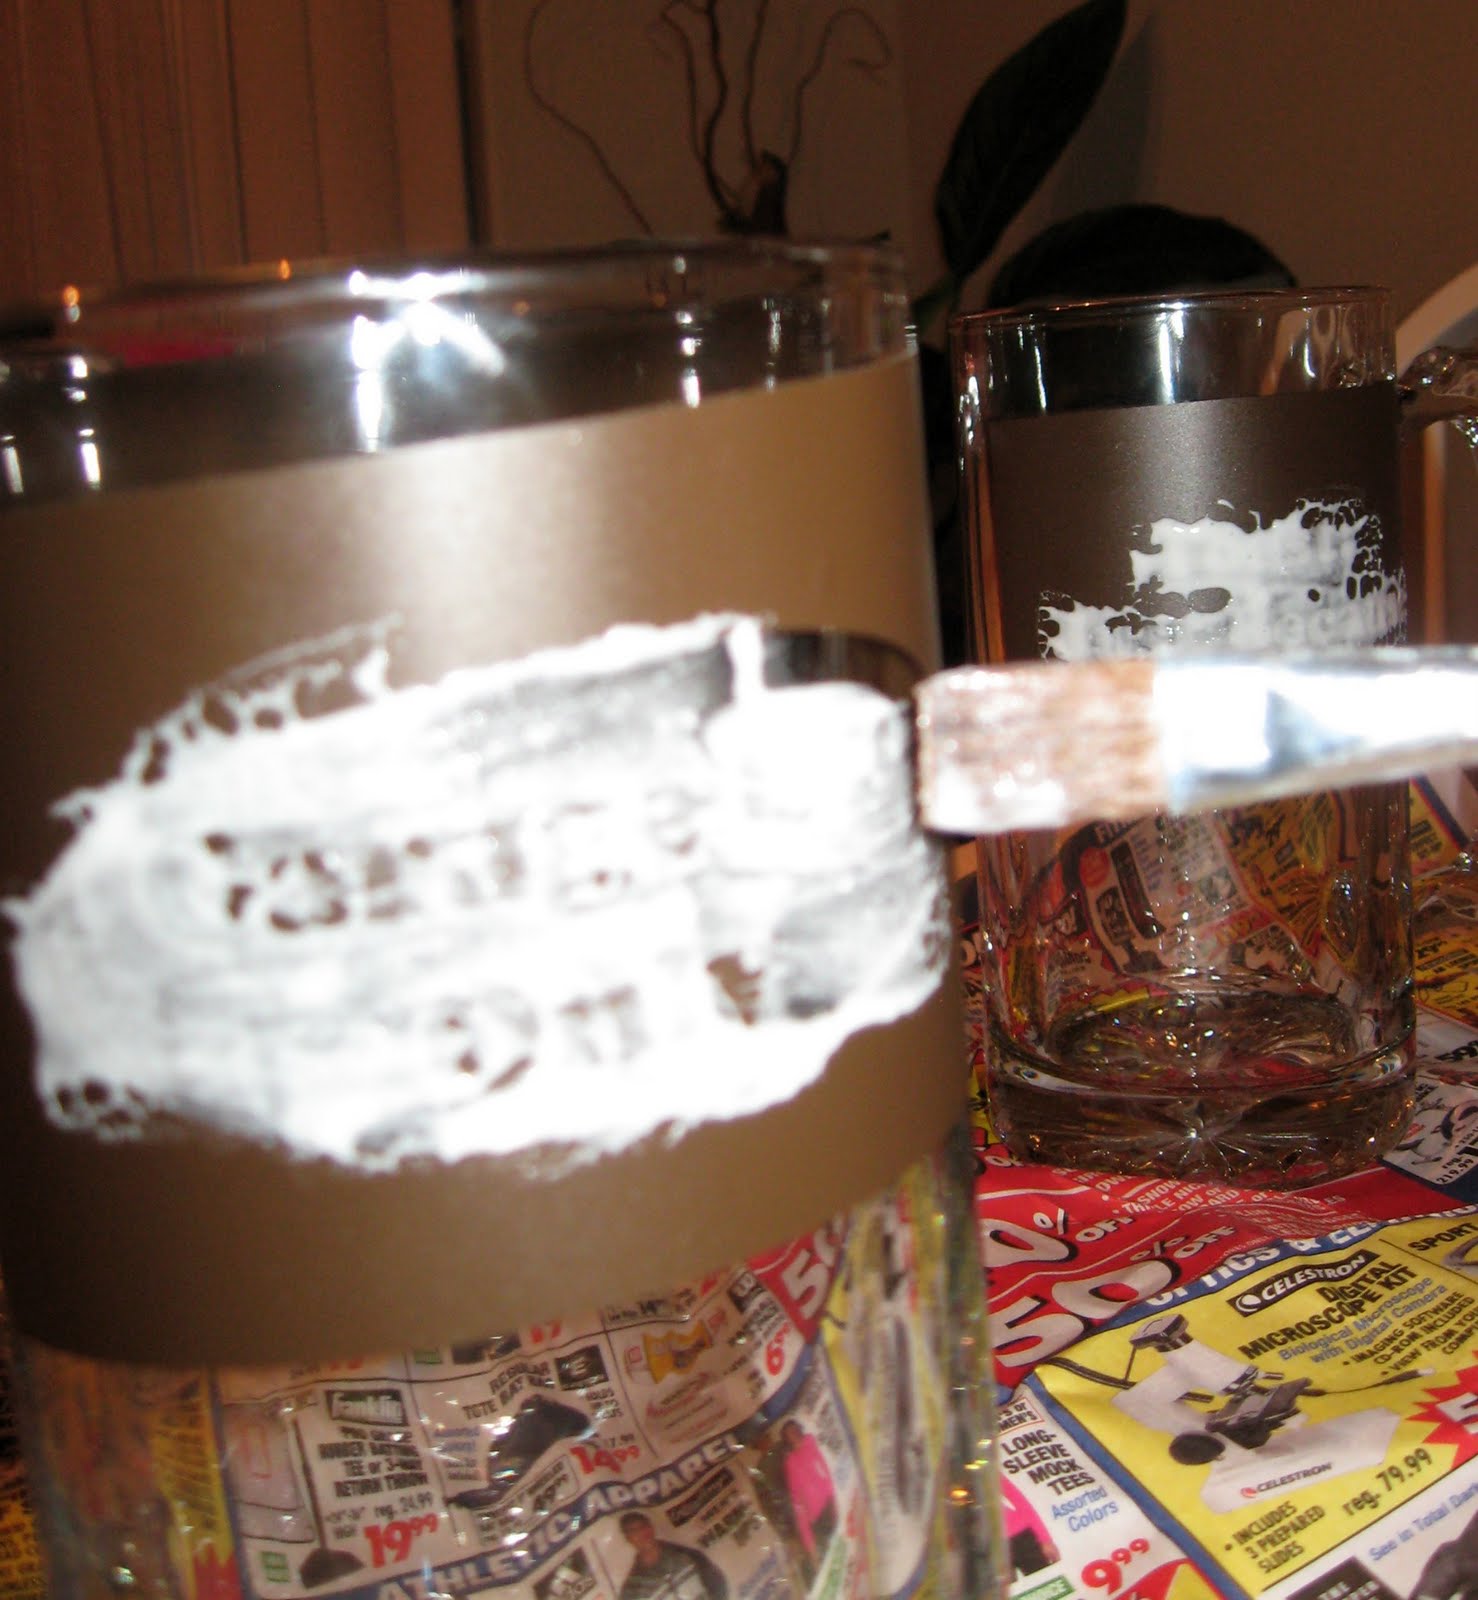


The instructions on the bottle of etching cream says that you should leave the cream on for 5 minutes, but I feel like it you get better results if you leave it on a little longer. I leave it on for about 20 minutes before washing it off.


Once you wash the etching cream off, remove the stencil and dry your glass piece off. When the glass piece is wet it's hard to see how your design turned out but once it's dry it'll show up nicely. Now you're left with an awesome permanent design!

So cool, right?


Seriously, the look so much cooler in person, I promise!
(It's really hard to take a picture of etched glass, especially when there is a design on both sides of a glass and I have to take pictures at night.)
My beer mugs say Garage Use Only on one side, since my Dad's garage is a regular place where people congregate and drink. On the other side of each mug I put a toast, which is something that happens in the garage after someone has had a few. The toast idea was actually Amazing Boyfriend's idea, but I loved it. The toasts I used are:
Toast: to Family and Friends
Toast: Good Times
Toast: to Rainy Days
Toast: Just Because
Amazing Boyfriend came up with a few others after I'd already made stencils and gotten the mugs prepped for etching, so maybe I'll use them on another project. But I think my Dad's gonna love these. I know I do.
This project was featured:

I'm sharing this project at the following parties:


I'm sharing this project at the following parties:


I'm glad you posted this tutorial. I've been wanting to try etching.
ReplyDeleteI'm following you from the link party.
Renee@http://reneeschirpings.blogspot.com
Love it! I am envious of your Silhouette!
ReplyDeleteGreat job! I want to try etching.
ReplyDeletevery neat! thanks for sharing and have a great weekend!
ReplyDeleteBethany, you got a Silhoutte??! So jealous.
ReplyDeleteLinking this up with us made the Creative Bloggers' Party & Hop better and more special. Thank you!